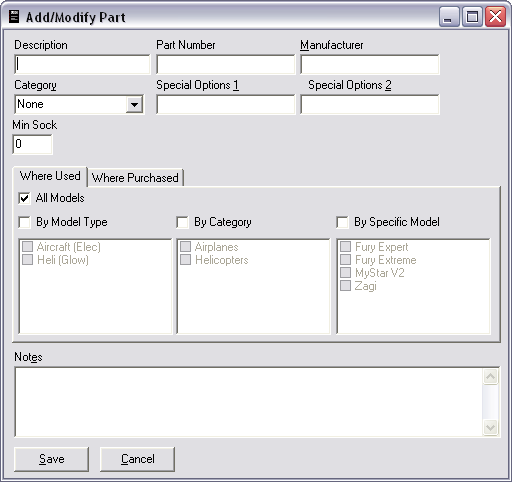
To add a new part right click on the parts container and select "Add Part" from the popup menu. Alternatively you can select "Spare Part" from the New menu. This will bring up the "Add/Modify Part" dialog box shown below.

Enter a unique name for this parts. Enter the part number and manufacturer. You may select a category for this part as well.
The "Min Stock" field is used to indicate how many of the parts you want on hand at any time. If the program detects you are low on a particular part it will show up when you create a "Shopping List".
Because you may have a lot of parts in your system, you can specify where they can be purchased from or what model they are used on to help filter out unwanted parts. On the screen above, you can limit the parts usage to a model type, category, or specific model. Multiple selections of each type are allowed.
If you click the "Where Purchased" tab the screen will change to that below:

Here you may specify where this part can be purchased. Again, multiple selections are allowed.
Click Save to create the new part or Cancel to abort.